Designing parts for foam thermoforming can feel tricky. You want the perfect shape and function. But how do you make sure the foam behaves like you need it to during the process?
Designing for foam thermoforming involves carefully selecting the right foam material based on its properties like heat stability and elasticity, and following specific engineering guidelines for part geometry, feature integration, and tolerance expectations to ensure successful and efficient production.

Getting the design right from the start is key. It saves time and money later. Let's look closer at what goes into making a great design for this process.
Understanding the Foam Thermoforming Process: Basics and Variations Exist
Are you confused about how foam thermoforming actually works? You might wonder what happens to the foam sheet. It seems like magic how it changes shape.
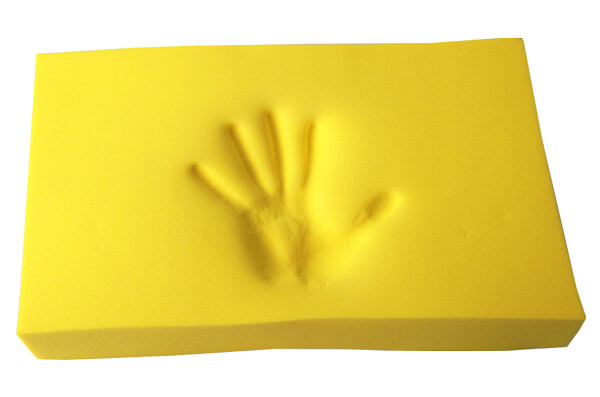
Foam thermoforming heats a flat sheet of foam until it is pliable, then uses vacuum or pressure to pull or push it into a mold cavity1, forming the desired three-dimensional shape as it cools and hardens.

The process starts with a flat sheet. I remember seeing it for the first time years ago. It looked simple, but there's more to it.
How Does Basic Thermoforming Work?
Basic thermoforming is straightforward. You heat the foam sheet. It gets soft. Then you put it over a mold. Vacuum pulls the sheet down onto the mold shape. Air pressure can also push it. The foam cools against the mold. It holds the new shape. This is the core idea.
What are the Variations?
There are variations on the basic process.
- Vacuum Forming: This is the most common. Vacuum pulls the heated sheet against the mold. It works well for simple shapes.
- Pressure Forming: This uses air pressure above the sheet. It pushes the sheet into the mold. Pressure forming can create sharper details. It can also handle thicker materials better.
- Twin-Sheet Forming2: Two sheets are heated at once. They are formed and joined together in the mold. This makes hollow parts.
Each variation has its uses. The right process depends on the part design. It also depends on the foam type. Knowing these basics helps you design better parts. You can think about how the foam will stretch and form.
Why Choose Thermoforming for Foam Components? Advantages and Limitations Matter?
You might ask why thermoforming is a good choice for foam parts. What makes it stand out from other methods? Are there downsides?
Thermoforming is often chosen for foam components because it is cost-effective for medium to large production runs, allows for large part sizes, and offers relatively fast cycle times compared to other molding processes, though it has limitations in achieving tight tolerances and complex geometries.

I have seen many projects where thermoforming was the best fit. It really shines in specific situations. But it is not perfect for everything.
What are the Advantages?
Thermoforming offers several advantages for foam parts.
- Cost-Effective Tooling3: Molds are often less expensive than injection molds. This makes it good for lower to medium volumes.
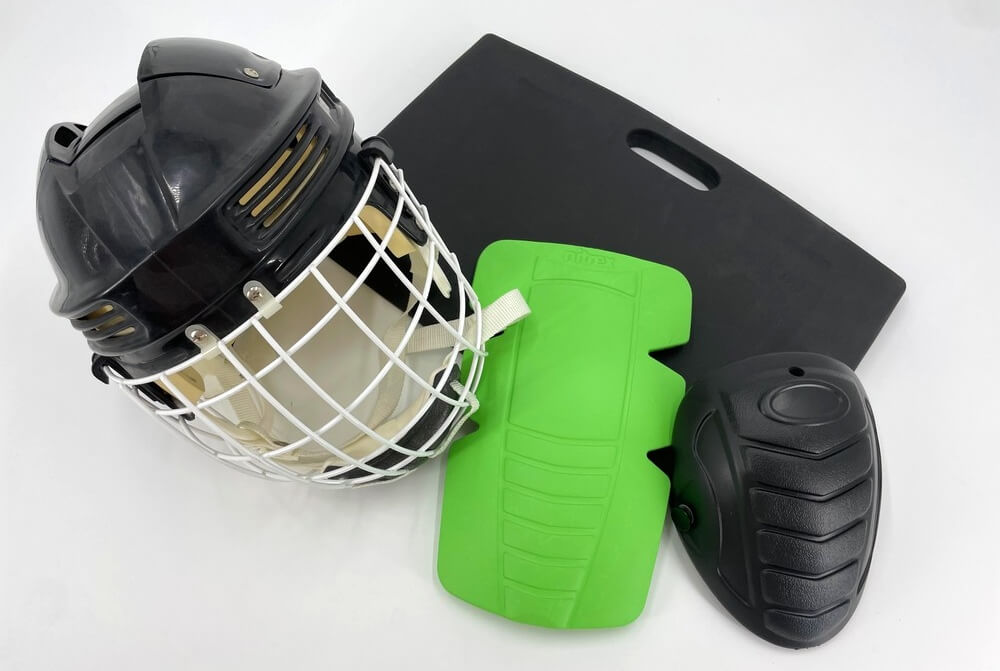
- Large Part Capability: You can make very large parts. This is useful for things like protective packaging or large pads.
- Faster Prototyping: Tooling is quicker to make. You can test designs faster.
- Material Efficiency: It uses sheets or rolls. There is less material waste compared to some other methods.
- Good for Thin Walls: It can form relatively thin foam walls.
I remember a project for a large protective case insert. Thermoforming let us make the large, complex shape needed quickly and affordably.
What are the Limitations?
Thermoforming also has limitations.
- Tolerance Control4: Achieving very tight tolerances can be hard. The foam shrinks as it cools. Controlling this is tricky.
- Complex Shapes: Parts with deep draws, sharp corners, or undercuts are difficult. The foam stretches and thins in deep areas.
- Wall Thickness Variation: The wall thickness is not uniform. It is thinner in stretched areas.
- Material Choice: Not all foams are suitable. They need to be heat-formable.
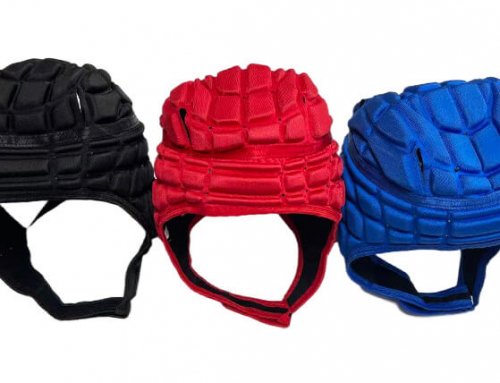
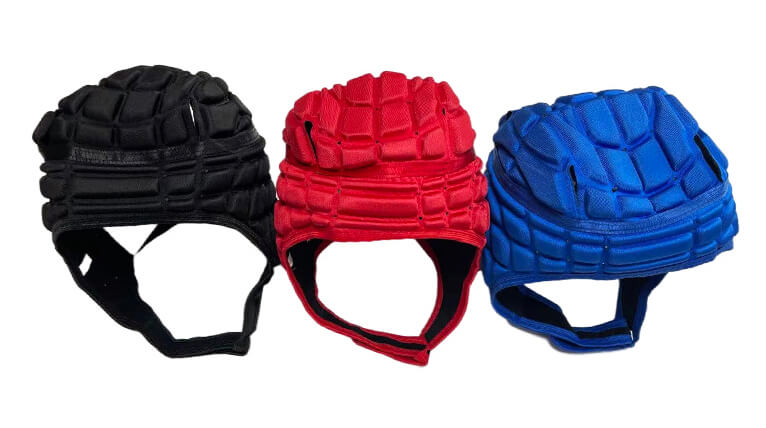
When I work with clients designing PPE padding, we discuss these points. We need to balance the need for specific shapes with what thermoforming can realistically achieve.
Material Selection and Properties are Crucial for Success?
Choosing the right foam is one of the most important steps. The material dictates how well it will form. What properties should you look for?
Selecting the correct foam material for thermoforming requires considering its heat stability, elasticity, density, thickness, and surface properties, with common choices including EVA, PE, and XLPE foams, each offering different characteristics that affect formability and final part performance.

I spend a lot of time on material selection with my clients. It is a critical decision. The wrong material can ruin a project.
Selecting the Right Foam Material for Thermoforming: Key Candidates
Certain foam types work better for thermoforming than others.
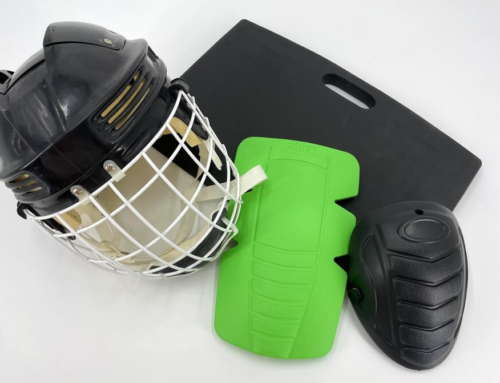
- EVA Foam (Ethylene Vinyl Acetate): This is very common. It is flexible and durable. It forms well. It is good for padding and protective gear.
- PE Foam (Polyethylene): PE foam is lightweight. It is also cost-effective. It is used for packaging inserts. It thermoforms well but might be less elastic than EVA.
- XLPE Foam (Cross-linked Polyethylene): This is a type of PE foam. It has better strength and durability. It also has good heat stability. It forms very well and holds detail better than standard PE.
Customers who often need durable, cost-effective materials for industrial packaging. PE or XLPE are usually good options for him.
Critical Material Properties Influencing Foam Thermoformability
Several properties matter a lot.
- Heat Stability: The foam must soften when heated but not melt or degrade. It needs a good forming temperature window.
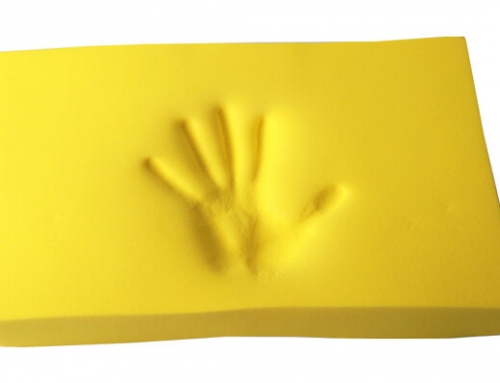
- Elasticity and Elongation5: How much the foam can stretch without breaking is key. This affects how well it fills the mold, especially in deep draws.
- Memory: The foam should hold the formed shape after cooling. It should not spring back too much.
- Consistency: The material must be uniform in thickness and density. Inconsistent material forms poorly.
I test material samples often. I check how they behave when heated. This helps predict forming success.
The Role of Foam Density and Thickness in Thermoforming Success
Density and thickness are big factors.
- Density: Higher density foam is usually stiffer. It might need higher temperatures or more pressure to form. Lower density foam is softer. It might tear or collapse if too hot or stretched too much.
- Thickness: Thicker sheets are harder to heat evenly. They also need more force to form. Thinner sheets heat faster. They can be prone to stretching too thin in deep areas.
We work with clients to find the right balance. For a helmet liner, density affects protection and comfort. Thickness affects the fit and how well it forms into the helmet shape.
Surface Finishes and Textures: Material Options and Thermoforming Impact
The surface of the foam matters too.
- Smooth Surfaces: These form cleanly. They show mold details well.
- Textured Surfaces: Some foams have existing textures. These textures can be distorted during forming. The mold can also add texture to a smooth sheet.
Choosing a material with the right base surface is important. You also need to consider if the forming process will change it.
Engineering and Design Guidelines are Necessary for Good Parts?
Once you pick the material, you need to design the part itself. Are there specific rules to follow for thermoformed foam? Yes, definitely.
Following essential engineering and design guidelines for foam thermoforming, such as managing draft angles6, corner radii, and incorporating features like ribs or bosses correctly, is critical for successful part ejection, uniform material distribution, and achieving the desired functional performance within expected tolerances.

Good design makes the process easier and the part better. I always review client designs with these points in mind.
Essential Design Guidelines for Thermoformed Foam Parts
Several fundamental rules apply.
- Draft Angles: All vertical walls need a draft angle. This helps the part release from the mold. Foam parts usually need larger draft angles than rigid plastics. I recommend at least 3-5 degrees, sometimes more.
- Corner Radii: Avoid sharp corners. Foam stretches around corners. Sharp corners cause thinning or tearing. Use generous radii, both inside and outside.
- Draw Ratio: This is the depth of the part compared to its width. Deep draws are harder. They cause significant thinning. Try to keep the draw ratio low if possible.
- Uniform Wall Thickness (Goal): While not perfectly achievable, design to minimize wall thickness variation. Avoid features that cause excessive stretching in one area.
When designing protective inserts, I always emphasize radii. A sharp corner in foam can become a weak point.
Incorporating Features: Ribs, Bosses, and Inserts in Thermoformed Foam
Adding features needs careful thought.
- Ribs: Ribs add stiffness. They need draft. They also need radii at the base. Avoid making them too tall or thin.
- Bosses: Bosses are raised areas, often for mounting. They are like small draws. They need draft and radii.
- Inserts: You can sometimes incorporate other materials or inserts. This is usually done after forming. Trying to form around complex inserts is difficult.
I had a project where a client wanted a complex rib pattern. We had to simplify it and add more draft to make it formable in foam.
| Feature Type | Design Consideration | Why it Matters |
|---|---|---|
| Draft Angles | Min 3-5 degrees on vertical walls | Part ejection |
| Corner Radii | Use generous radii (inside/out) | Prevent thinning/tearing |
| Ribs | Add draft, radii at base | Stiffness, formability |
| Bosses | Add draft, radii | Mounting points, formability |
Tolerancing Thermoformed Foam Parts: What to Expect
Tolerances are looser than for injection molding.
- Shrinkage: Foam shrinks as it cools. The amount varies by material and process.
- Flexibility: Foam parts are flexible. Measuring them accurately can be hard.
- Process Variation: Temperature, pressure, and cycle time variations affect the final size.
I tell clients that thermoformed foam tolerances are typically +/- 1mm or more, depending on size and complexity. Very tight fits are challenging. We focus on functional fit rather than exact dimensions sometimes.
Tooling and Process Interaction Affect Results?
The mold design and how the process runs are linked to the part design. How do they work together?
Tooling design for foam thermoforming must account for material shrinkage7, incorporate proper draft and radii based on the part design, and integrate effective heating and cooling strategies to optimize material flow, ensure accurate forming, and achieve consistent part quality.

The mold is where the magic happens. But the process settings are just as important.
Tooling Design Considerations for Optimal Foam Forming Results
The mold is usually made from aluminum or composite materials.
- Material: Aluminum is common for production. It heats and cools well. Composites are good for prototyping or short runs.
- Draft and Radii: The mold must match the part design's draft and radii requirements. Molds are often slightly oversized to account for shrinkage.
- Venting: Air trapped between the foam and the mold must escape. Proper venting (small holes) is crucial, especially for vacuum forming.
- Temperature Control: Molds can be heated or cooled. This helps control the foam temperature during forming and cooling.
Designing the mold requires understanding how the foam will flow and stretch into it.
Material Shrinkage: How to Account for It in Part and Tool Design
Foam shrinks when it cools.
- Shrinkage Rate: The shrinkage rate depends on the specific foam type, its density, and the process settings. It can be 1-3% or more.
- Accounting for Shrinkage: The mold is made slightly larger than the desired part size. The amount larger is based on the expected shrinkage rate.
- Testing: We often run tests to confirm the actual shrinkage for a specific material and design.
I always build shrinkage into the tool design calculations. It prevents the parts from ending up too small.
Heating and Cooling Strategies: Impact on Material and Part Quality
Controlling temperature is vital.
- Heating: The foam sheet must be heated evenly to the correct temperature. Too hot, it degrades. Too cold, it won't form. Radiant heaters are common.
- Cooling: The foam must cool in the mold to set the shape. Cooling time affects cycle time and shrinkage. Cooling the mold helps speed this up.
Proper temperature control ensures the foam is pliable enough to form without tearing. It also helps the part hold its shape after ejection.
Troubleshooting and Optimization Help Improve Designs?
Even with good design, issues can arise. How do you fix problems and make the process better?
Common foam thermoforming defects like webbing, thinning, or incomplete forming can often be prevented through careful design adjustments, material selection, and process optimization, while prototyping strategies8 allow for testing and refining both the design and process before committing to full production tooling.

Troubleshooting is part of the process. We learn from each run. Optimization makes everything more efficient.
Common Foam Thermoforming Defects and How Design Can Prevent Them
Some problems show up often.
- Webbing: This happens when foam folds or wrinkles instead of stretching smoothly, often in corners or tight radii. Design fixes include increasing radii or adding draft.
- Thinning: The foam stretches too much in deep areas. Design fixes include reducing the draw depth or adding material in that area. Sometimes material choice helps.
- Incomplete Forming: The foam does not fully reach all parts of the mold. This can be a heating issue, lack of vacuum/pressure, or a design that is too complex for the material. Design fixes include simplifying geometry or improving draft/radii.
- Poor Detail: Features are not sharp. This can be material density, insufficient pressure, or tooling issues. Design needs to consider if the feature is formable in foam.
I remember a packaging insert that had webbing in the corners. We added larger radii to the design, and the problem went away.
Prototyping Strategies for Thermoformed Foam Designs
Prototyping is very helpful.
- Soft Tooling: Use less expensive tooling materials like wood or composite. This lets you test the formability of the design and material quickly.
- Single Cavity Molds: Make a mold for just one part. This is faster and cheaper than a multi-cavity production tool.
- Material Trials: Test different foam types or densities on the prototype tool. See how they form.
Prototyping helps catch design issues early. It is much cheaper to change a prototype tool than a production tool. It gives confidence before investing heavily.
Conclusion
Designing for foam thermoforming needs attention to detail. Material choice and engineering guidelines are key. Getting it right leads to successful, functional parts.
-
Learn about mold cavities to understand their crucial role in shaping materials like foam during thermoforming. ↩
-
Find out how Twin-Sheet Forming creates hollow parts and its unique benefits in manufacturing. ↩
-
Learn how cost-effective tooling can significantly reduce production costs and improve project feasibility in foam manufacturing. ↩
-
Understanding tolerance control in thermoforming is crucial for precision in manufacturing. Explore this link to learn more about the challenges and solutions. ↩
-
Elasticity and elongation are key to foam's ability to fill molds effectively. Discover more about their impact on performance here. ↩
-
Learning about the significance of draft angles can improve your design strategy and part release efficiency. ↩
-
Understanding material shrinkage is crucial for effective design and production in foam thermoforming, making this resource invaluable for your projects. ↩
-
Learning about prototyping strategies can help you refine designs and improve efficiency, ensuring better outcomes in foam thermoforming projects. ↩
Leave A Comment